The story of the world famous genius who humbly started out in their garage has been told many a time. For most of us in the music biz, however, we’re at the beginning of that journey; making our music in that “garage” (or corner of a bedroom, closet under the stairs, uninsulated outbuilding or even on the sofa while our partner watches the TV). The acoustics of this "garage" make speaker monitoring so in accurate, it’s pointless.
Or maybe you have an awesome setup but your neighbours/partner has got somewhat fed up with the same 15 seconds of audio on loop for the past 2 hours. In either case, headphones may be your best or only option for polishing your tracks.
Good news though, I have successfully mixed and mastered tracks that have been label release ready without turning on a single speaker. Don’t let anyone tell you it can’t be done, or even that it shouldn’t.
However, to do it, you need a lot of help. This article goes through my box of tricks and plugins that I use to make it possible.
The aim is to create a great mix that translates across any system. To do this, you need to get your overall balance right, your dynamics tight and your instruments neatly separated with EQ. You need to be able to hear with your ears and your eyes and you need to be able to test multiple systems to understand translation issues. How do you do that from headphones?
Use different headphones for different things...

I use two sets of headphones that I have got to know very well. I have AKG K712s, which are really detailed but suck in the low end. They were my only headphones and all my tracks sounded muddy and lifeless in the low end of different systems. Took me a while to realise that this was not down to my poor mixing but down to the fact I couldn't hear what was actually happening in the low end! I now use these for detail - hearing the impact of compression and stereo stuff like panning and effects - because that is what they are good at.
The second set are Audio Technica ATH-M50X. They are actually closed cup (which everyone says is a no go) and are bass heavy. They are my DJ headphones (it helps I’ve heard a lot of tracks through them!). They exaggerate the low end loads (so I can hear it!!!) and are really sensitive to low end mud so I find that if I make the mix clear on these, it’ll sound brilliant across listening headphones and most hi-fi/home speaker systems. The most important thing is that you can hear what you are doing.
I produce and do the initial mix balance with the ATH-M50Xs. Then I will have a listen on the AKGs to see if there is anything dodgy going on where the ATH-M50Xs lack detail (peaks, panning, reverb, etc). It’s like shining a torch over everything to run a quick check. The changes I’ll make here are usually small and almost completely unnoticeable in the ATH-M50X headphones.
Now there is a risk of under baking the low end when you have headphones that exaggerate it but the next point will explain how I get round that.
Mastering the mix Reference plugin
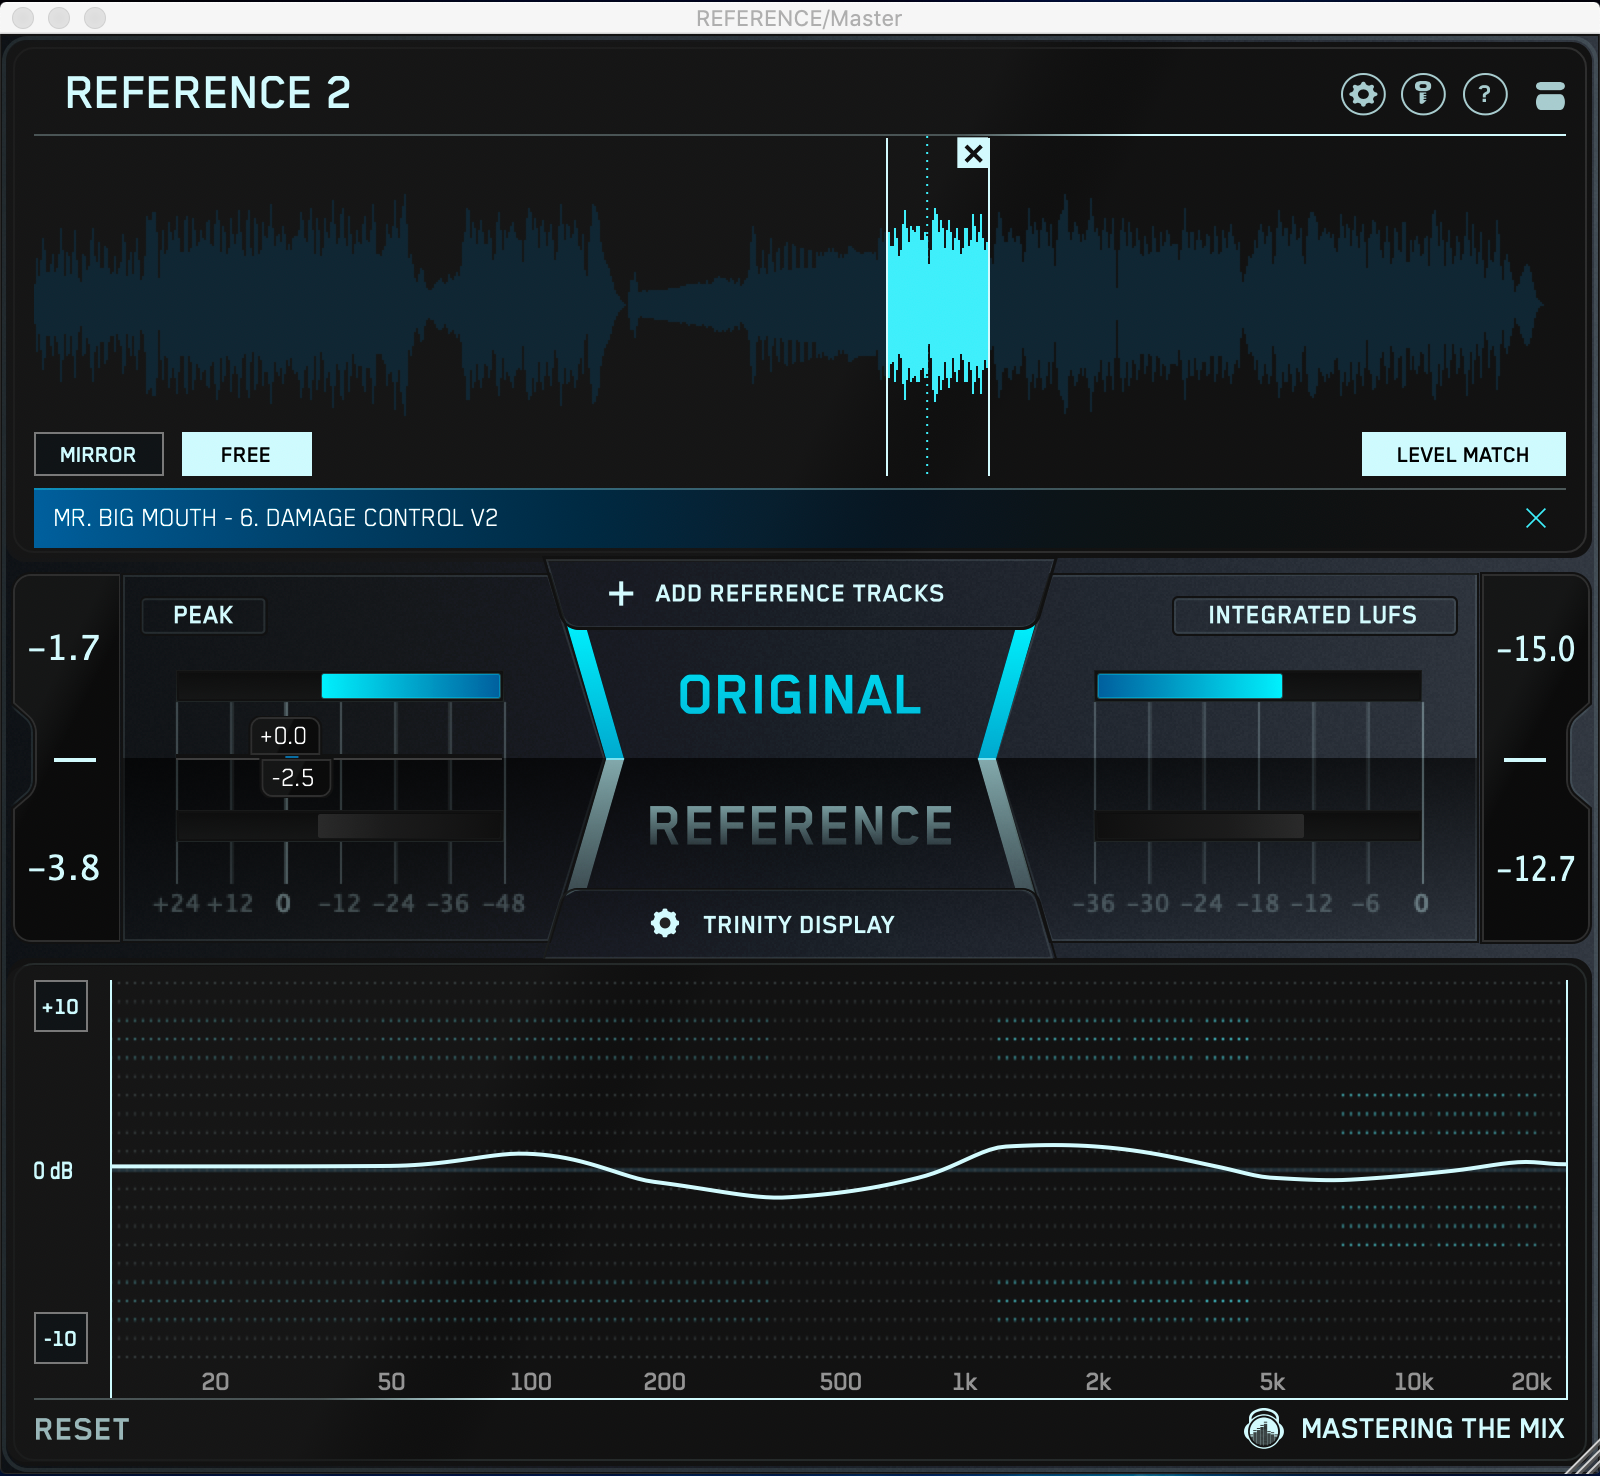
This plugin is awesome - well worth the £40 I spent on it. I load in a reference track with similar instrumentation and a couple of my own tracks that I want the track to work well alongside. Then at the click of a button it level matches and enables me to switch between my track and the references with just one click (I also map this to the letter “r” on my keyboard so I can do it really easily!)
However, it goes way beyond this. It also gives you a balance line so you can see where on the frequency spectrum your track is too loud or quiet, compared to the reference. This is good for low end in particular, especially sub, when you’re just not in a monitoring environment that will enable you to hear this clearly.
Headphones, no matter how good, will generally not be able to reproduce the sub 80hz region accurately making it really tough to tell whether your sub area is too loud or too weak. This gives me the edge I need as it detects loudness (lufs) and displays it for you. That way I can be sure I don’t have too little or too much sub (or any frequency).
The aim here is not necessarily to match the balance line but have it close where it musically makes sense. For example, if your track had a ride and the reference doesn’t, it’s probably okay that your track is a little higher in the 3-8k region. But low end, I tend to keep that as close as possible.
There are a few things to consider here though:
- Don't address with EQ on the master bus (if you can address it in the mix). This is especially true of the differences are big. You'll be affecting lots of other things and it'll sound crap
- You need to think through how you're going to make up/reduce energy in certain regions. For example, is it the sub that needs to come up, or the kick? Or are they well balanced so it should be both? And if it is the kick, is it just the low end that needs to come up or the whole kick? You can click on an area to zone in on the instrumentation to see. I'd also flick to the reference to see how theirs sounds to help you make that decision
- Your ears should still have veto rights. Sometimes your track will just need to sound different to sound good. For example, if your track is in a different key, the energy will be in slightly different places on the spectrum and that is totally fine.
- Click 'reset' fairly frequently to make sure the level matching is still accurate, especially if you've had to make quite large changes to get a better balance
This plugin has helped me learn a lot but one big realisation was that my kicks didn’t have enough low end energy. I’d focus on making them punch by boosting the 2-5k region (the beater) but when I compared my tracks to the reference, I would always need to boost at 100hz. This brought my attention to the fact that my kicks were just simply not banging enough - embarrassing as that is to admit.
It does also have “punch lines” that can help you understand how compressed your track is compared to others. I don’t really use this functionality. The reason is that I don’t want my mixes to have master level compression (that’s for mastering) and even in mastering, I’m usually mastering for streaming so to a loudness of -14 LUFS, which is the best level of loudness for streaming sites. CDs are usually mastered more loudly at -9 LUFS. You'll probably of heard of the loudness wars (look it up if you haven't) but basically -14 LUFS allows you to leave more dynamics in your master, which is a good thing. However this does mean that, if you are mastering to -14 but referencing a -9 track, you are always going to find your track is under compressed, which could lead you to over compress for the wrong reasons.
That said, if you’re trying to match the loudness of your references, it’s probably quite helpful for understanding where you are losing headroom. If somewhere is less compressed (especially low end), you will have peaks that are eating up your headroom so get compressing to give you more space to boost the volume.
Waves Abbey Road 3 plugin...

Headphones do exaggerate the stereo image as there is no cross talk (where the left ear also hears what the right speaker is playing and vice versus). Headphones are also just one system that people listen on and I need to know how it will sound on multiple systems.
This plugin solves both those problems. It emulates what it is like to be in the abbey roads studio 3. I put my headphones on, stick this plugin on at the very end of my master bus chain and all of a sudden, I’m not listening to headphones, I’m listening to speakers in an acoustically treated room. It models the cross talk and room interaction making my space based decisions (panning and reverb/delay) much more accurate.
It also has a built in response flattening function that applies an EQ that compensates for the EQ curve on my headphones ("Headphone EQ" in the picture). This makes what I hear more accurate and the resulting moves more consistent across systems.
And finally, you can switch between near, mid and far monitor systems. Near is like your studio monitors. Mid is like a hi fi system and far is like a set of club speakers. Your track should sound very similar across all 3. What I mean by this is that instruments should stay balanced relative to each other across all 3. Of course each speaker set will sound different (the far in particular has a strong presence and sub boost) but this shouldn’t undo your mix. Have a listen to some references through this plugin to get a sense of what I mean.
Normally when there is an issue here it is down to poorly controlled dynamics or a dodgy harmonic that need a little notch on the EQ. A little bit of targeted compression or EQ can sculpt the sound to be similar across all 3. The one I tended to find was in the 150-300hz region on my bass instrument as I switched between near and mid speaker sets. Smooth this out and voila, perfect translation!
What’s really cool in using this plugin is that I can listen to headphones, then model 3 different sets of speakers, all within a few clicks. Really powerful tool for the headphone mixer! It’s saved me hundreds of trips to the car!

I don’t spend a lot of time with the second set of headphones or the abbey road plugin. I normally spend 90% of my time in one set of headphones and then switch over to check for anything that sounds wrong or pokes out in the other headphones and in the different abbey road speaker setups. The exception is when I’m doing reverb - I will usually do this in my more detailed headphones and with the abbey road plugin switched on.
I use these tools to get round the headphones only environment that I am often mixing and mastering in. I'd recommend trying them out, if you have the same challenge. It is the mix of them together that works for me. For example, I use the headphones to ensure I can hear my moves in the low end but reference to make sure I’m not making things to thin and then abbey road to ensure that what I’m hearing on one speaker is the same on another.
Don’t let anyone tell you it can’t be done, because it can.